
Recently, at our April 2024 meeting, FAS member Dr. Bill Rankin gave a most interesting talk about the ZWO Seestar S50 telescope.
Two days after Bill’s talk, the folks at BBC Sky at Night Magazine published a review of the Seestar S50. It is getting a lot of hype lately. So, we thought it would be appropriate to post something on the FAS website about this telescope with some information and a few reviews found online.
In November 2024, ZWO launched the Seestar S30 – a smaller version of the Seestar S50. At a lower price, it has a smaller lens (30 mm), but one with a wider field of view.


Below are a few images from Bill’s Seestar S50. The S50 comes with a solar filter and FAS member Betty Allison took a couple images of the April 8th solar eclipse with her Seestar S50. FAS member Bruce Gavett added few more images from his Seestar.


Seestar images credit: Bill Rankin, Betty Allison, and Bruce Gavett
If you’re thinking about purchasing a Seestar, go here.
If you have a Seestar and want to learn more, go here.
Here is a list of Deep-Sky Objects to target with your Seestar.
For more on astrophotography including other “smart” telescope options, see our Astrophotography Page. You can also find a summary of the different types of deep-sky objects on our website.
Please note that FAS does not necessarily endorse or recommend this or any other specific telescope or accessory. We simply provide information that might be interesting and useful for the public.
More Sample Images
FAS member Bruce Gavett has taken several images over the last few months with his Seestar S50. (Credit: Bruce Gavett).
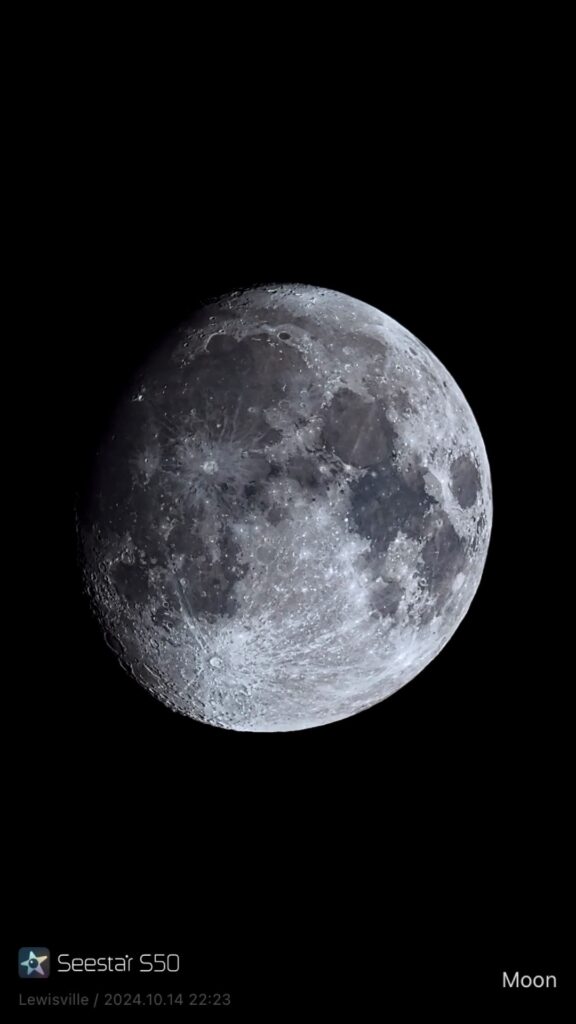
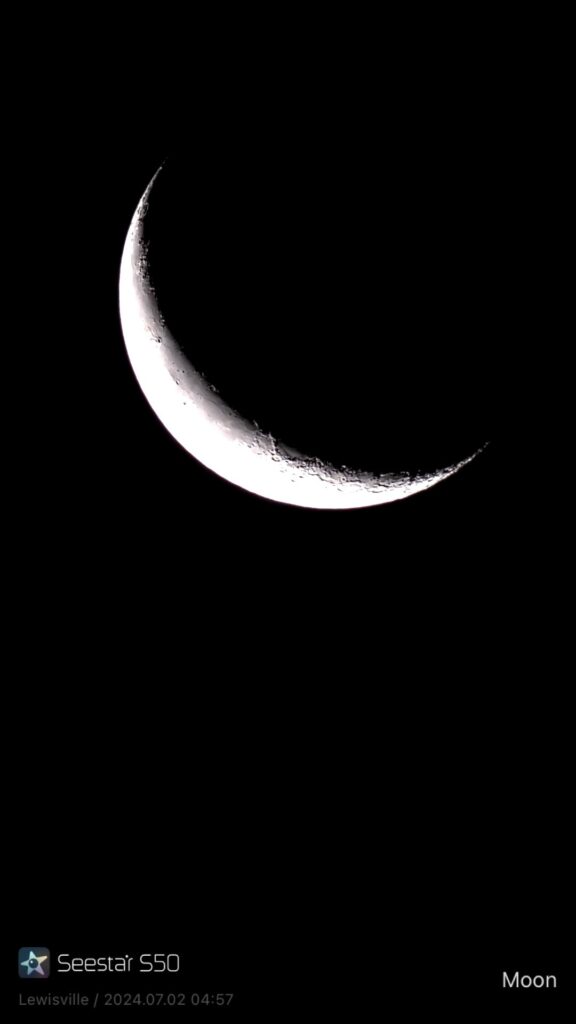
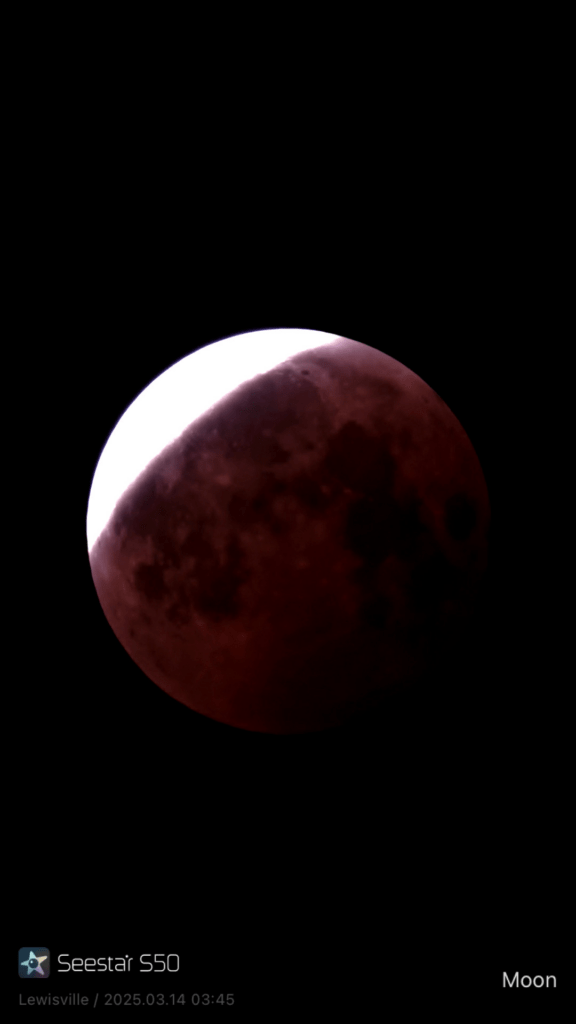
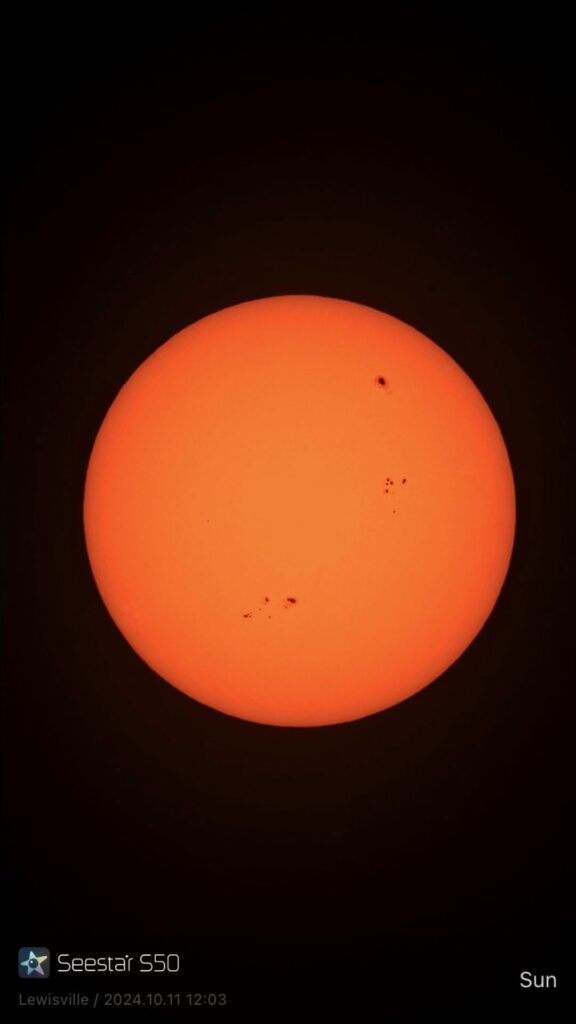
The easiest target was the Moon, highlighted by the August 2024 blue super-moon and March 2025 lunar eclipse. Note how clear you can see the rays coming from Tyco. And Copernicus is easy to find near the center. The Sun presents a similar target, although you must use the solar filter provided by ZWO.


Open star clusters can be found and imaged in even light polluted areas with only a short (3 minute or so) set of exposures. However, a longer exposure time will bring out more of the adjacent stars.


Globular clusters were the same – led, of course, by the Hercules cluster (M13) and M15 in Pegasus. However, a longer exposure time does bring out more details and more stars.


Planetary Nebula are easy targets, although, a few, such as the Helix nebula required a much longer set of exposures. Supernovae remnants are a bit more difficult and also require a longer series of exposures, but the Veil nebula, in particular, is worth the effort.


Emission nebulae are a bit more challenging, particularly from a light polluted area, but they can be viewed using longer sets of exposures and with the dual band filter. Larger nebula such as the North American and California nebulae are even more challenging because they exceed the Seestar S50’s field of view.


Galaxies are the most difficult. Light pollution does limit what you can see, therefore, a dark location is best.


Reviews (S50)
- Sarah Peasgood. “The Seestar S50 is among the cheapest smart telescopes available. But is it any good? We put it to the test.” BBC Sky At Night Magazine. April 19, 2024.
- Jamie Carter. “ZWO SeeStar S50 smart telescope review.” space.com. May 23, 2024.
- “Seestar S50 Review.” AstroBackyard. December 12, 2023.
- Anthony Robinson. “ZWO Seestar S50 Review: Perfect for Astrophotography Beginners.” Skies & Scopes. February 26, 2024.
- Tony Huffman. “ZWO Seestar S50 Review.” PC Magazine. May 16, 2024.
- Jamie Carter. “ZWO Seestar S50 review: bringing smart telescopes to the masses.” Digital Camera World. April 27, 2024.
- Al Milano. “Review Of The Seestar S50 (Smart Telescope) by ZWO.” AstroMart.
Resources (S50)
- Trevor Jones. “Seestar S50 In Depth Review.” AstroBackyard. October 25, 2024.
- Tim Trott. “Getting the Most from the ZWO Seestar S50 – Specs, Tips and Tricks.” Perfect Astronomy. January 22, 2024.
- “ZWO Seestar All-In-One-Telescope.” High Point Scientific.
- Tom Harnish. “Unofficial Seestar S50 User Guide.” June 2024.
Videos (S50)
- “Seestar for Dummies.” Astronomy Tips and Reviews with Curtis/YouTube.
- “ZWO Seestar S50 50mm f/5 All-in-One Smart Telescope.” B&H Photos Video Audio.
- “My SeeStar S50 Full Review. Is It Worth The Hype?” Delta Astrophotography/YouTube. December 27, 2023.
- “Seestar S50 – One year on from release – does it live up to the hype?” StargazerMan/YouTube. June 24, 2024.
- “It’s Not That Good – Review of the Seestar S50. Plus: What’s Wrong With Smart Scopes? Let’s Look!” Ed Ting/YouTube. March 24, 2024.
- “AMAZING images with the Seestar SMART TELESCOPE⚡ FULL tutorial, Free Software ONLY!” Cuiv, The Lazy Geek/YouTube. July 5, 2024.
References and Reviews (S30)
- High Point Scientific. High Point Scientific Team. “Seestar S30 Smart Telescope Review,” AstronomyHub, High Point Scientific, 1 Nov. 2023.
- “SEESTAR S30 | Trial & Review! Best smart scope under $350.” ScottCastrophotography/YouTube. November 17, 2024.
- “Smart Scope BATTLE! SAME Night, SAME Targets! Can the Seestar S30 BEAT its big brother?” Cuiv, The Lazy Geek/YouTube. December 12, 2024.
AstroEdit (iOS App)
- “AstroEdit.”
- “Transform Your Seestar Images.” Tom Harnish/YouTube. December 24, 2024.
- “AstroEdit – Astrophotography Processing for iOS.” View Into Space/YouTube. December 29, 2024.
Seestar Facebook Groups
Purchasing Information, Apps, and Manuals
- Seestar S50 Telescope.
- Seestar S30 Telescope.
- Quick Guides from ZWO.
- User Manuals from ZWO.
Seestar Accessories
- Taller Tripods.
- “NEEWER 77 inch Camera Tripod (1/4” QR).” Amazon.
- “NEEWER 77 inch Camera Tripod. (1/4″ to 3/8” QR).” Amazon.
- Tripod Levelers.
- “NEEWER Tripod Head Leveling Base Camera Leveler.” Amazon.
- “Tripod Leveler stand.” Amazon.
- Upgrade Kits and Accessories (S50)
- “SeeStar Performance Upgrade Kit. High Point Scientific.
- “XJJ Telescope Dew 4 “,Bahtinov mask, Cap Cover and Diffraction Spike Set are Compatible with ZWO SeeStar S50.” Amazon.
- “ZWO Seestar S50 – MASK Deluxe Bundle (Bahtinov Mask and Dust Cover), Black.” Amazon
- “Cap Cover and Bahtinov Mask Focus for ZWO Seestar S50,Lens Cap for Seestar S50 Accessories for ZWO Seestar S50 Made of TPU Black.” Amazon.
- “Seestar S30 Accessories.” Amazon.
- Dew & Light Pollution Shields (S50)
- “XJJ Dew Shield for S50.” Amazon.
- “TEYOUYI Dew Shield for S50.” Amazon.
- “ZWO Seestar S50 – Dew Shield.” Amazon.
- Upgrade Kits and Accessories (S30)
- “Seestar S30 Accessories.” Amazon.
- “Seestar S30 Accessories.” Amazon.
- Dew & Light Pollution Shields (S30)
- Adjustable Heads/Wedges for EQ Mode.
- “TH10 Hydraulic Tripod Head.” ZWO.
- “Equatorial EZ Mount for Seestar.” Peterson Engineering.
- “Sky-Watcher” Wedge.
- “INNOREL F20 Fluid Head.” Amazon.
- Additional Adjustable Heads/Wedges for EQ Mode.
- “Alt-azimuth Adjustable Base.” ioptron.
- “Precision AZ/EQ Base.” ioptron.
- “WO Vixen Style Latitude Base Mount.” Williams Optics. Low & High Latitude.
- “Z Flex Tilt Tripod Head.” Amazon.
- “Neewer Upgraded Z-Flex Tilt Head.” Amazon.
- Mounting Plate/Base for EQ Mode.
- “80mm/3.15″ Telescope Rail Bar Vixen Style Dovetail Mounting Plate, with 1/4″ 3/8″ D Ring Camera Screw.” Amazon
- “Agena Synta / Vixen Style Dovetail Mounting Base. Agena Astro.
- “Neewer Camera Panoramic Panning Base with Style Plate, 3/8-inch Screw.” Amazon.
- “Sky Watcher S20550 Star Adventurer Ball Head Adapter, Telescope Accessory, Green.” Amazon.
- “Apertura Premium Carbon Fiber Tripod.” High Point Scientific.
- drholden. “ZWO Seestar S30 / S50 Vixen Dovetail Bars.” Printables.
- M8 bolt screws for Sky-Watcher Wedge.
- “HARFINGTON 4pcs Adjustable Clamping Lever Handles M8 x 50mm.” Amazon.
- “Hilitand 4PCS Clamping Lever Handle,M8 Stainless Steel Male Thread Adjustable Handle Machine Knobs,Black (60MM).” Amazon.
- “Hilitand 4PCS Clamping Lever Handle, M8 Stainless Steel Male Thread Adjustable Handle Machine Knobs,Black (70MM).” Amazon.
- Adjustable Heads/Wedges, Mounting Plates/Bases, and M8 bolt screws have not be tested on a Seestar – fully check these out before making a purchase.
- Wedges may require an additional quick release plate with a 3/8″ screw (e.g. Vixen Dovetail Base).
- The SkyWatcher Mount has a knob that is too large – it will interfere with the Seestar. A M8 replacement with a smaller knob or a longer bolt screw (maybe 70mm) is suggested.
- … more to come.
Please note that FAS does not recommend or endorse any specific supplier, telescope, or accessory, we only provide information that is generally available to the public.
Seestar Workflow
Here is a basic workflow for taking and processing images with your SeeStar.
- Set up your Seestar in either alt/az mode or EQ mode.
- If alt/az mode: Level your Seestar.
- If EQ mode: Align your Seestar to the north (ZWO tutorial).
- Make sure the option to save individual frames is turned on (ZWO tutorial).
- Take 10 sec (or maybe 20 sec) frames for 15 minutes or longer.
- View the live stacked image on your Seestar.
- If your image looks good, you can skip on to the next step.
- If the image is poor, you might have to delete several frames and re-stack your subs (frames). You might want to do this anyway.
- Review your image subs (frames) in Seestar’s My Album and remove any “bad” frames.
- Re-stack the image subs (frames) using Seestar’s Deep Sky Stack (ZWO tutorial)
- Run Seestar’s AI Denoise routine to clean up your image (ZWO tutorial).
- (Optional) Enhance your denoised image by increasing the brightness and contrast.
- Save your final image to your tablet or phone.
- Delete the image subs (frames) from Seestar’s My Album.
If you have a bit more experience, here is a more advanced workflow.
- Set up your Seestar in either alt/az mode or EQ mode.
- If alt/az mode: Level your Seestar.
- If EQ mode: Align your Seestar to the north (ZWO tutorial).
- Make sure the option to save individual frames is turned on (ZWO tutorial).
- Take 10 sec (or maybe 20 sec) frames for 15 minutes or longer.
- View the live stacked image on your Seestar. If the image is poor, you might have several frames to delete.
- Review your image subs (frames) in Seestar’s My Album and remove any “bad” frames.
- Connect your Seestar to your computer using a usb c cable.
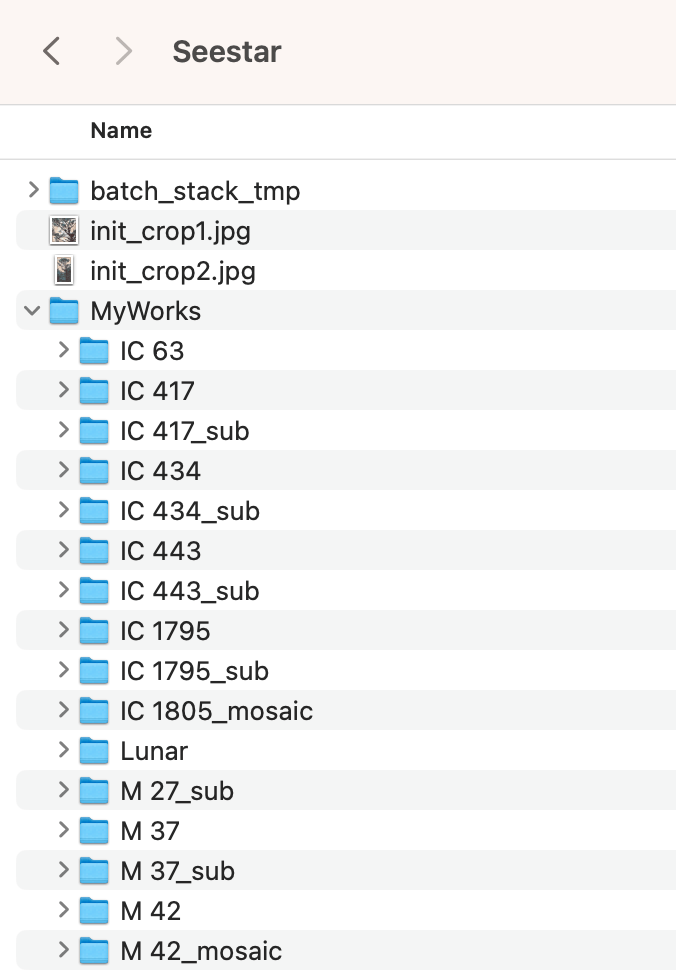
- Copy your saved sub frames from Seestar’s MyWorks folder to your computer.
- (If not done above) Review your sub frames and remove any that are “bad” using a 3rd party package.
- Restack your sub frames using a 3rd party package such as Siril.
- Process your image(s) using a 3rd party package such as Siril.
- Periodically delete your sub frames from Seestar’s My Album.
Here is a more detailed workflow that you can print:


Seestar images following the workflow. Live Stacked image, Single sub (frame), Multiple sub (frames), DSO Re-stacked image, AI Denoised Image, Enhanced Image.
SeeStar Image Storage
Images taken by your Seestar are stored in its internal memory. You have 65GB (less the operating system) available. To access these images, go to the main screen and choose My Albums. This will take you to a screen that shows you the images you have saved to your device (e.g., iPad or iPhone) and Seestar, the images stored in your Seestar. Select Seestar and you will see the final images along with the “sub_s”, which are the 10 second snap shots.
You can select any of these images and download them to your device. You can also go back to the home screen and choose Deep Sky Sacker to re-stack the available sub_s.
ZWO tutorial Image Storage. https://h5.seestar.com/course/79047


Focusing your Seestar
Your Seestar will perform an auto-focus when initializing itself before your first object of the night. Between images (before you push the start button for the next image), there is also an option to focus the telescope. Click on it and you can either initiate the auto-focus process or do a manual focus.
The Seestar’s focus is captured as a POS, which is …
There are some settings on the My Seestar page for focusing. It shows the current POS and the default POS where your Seestar will start the autofocus. You can adjust this starting POS, but do so with extreme caution. For reference, my Seestar has a default POS of 1551. I’ve seen others reference numbers in the high 1400 to 1600 range.
Focusing your Seestar can be enhanced by using a Bahtinov mask. It produces an image with three spikes. The idea is to focus on a bright star and make sure the middle spike is vertical and exactly between the other two spikes.
ZWO tutorial. Turn on manual focus. https://h5.seestar.com/course/79210


Re-stack Images using Deep Sky Stack
Some of your stacked images will end up with dark corners due to the rotation of Seestar’s field of view over time. There are also times when lines appear due to satellites passing through and, from time to time, trees get in the way.


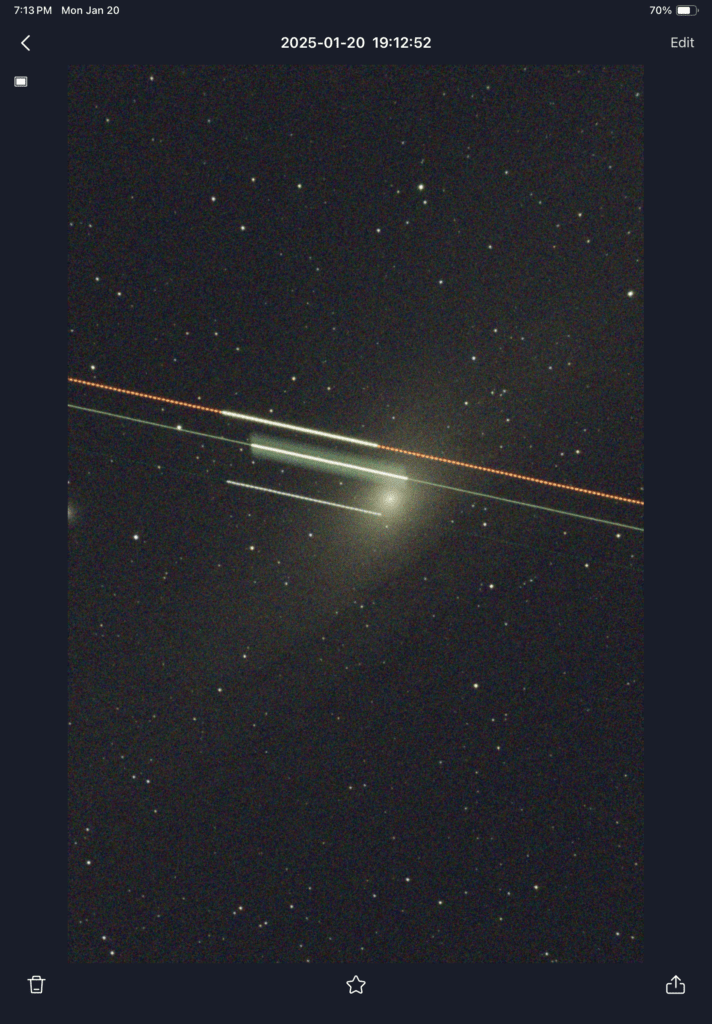

Make sure you are saving your individual sub frames to Seestar’s My Album and then go back and re-stack them using Seestar’s Deep Sky Stack. Be sure to remove the sub frames with the trees and satellite tracks before re-stacking.
ZWO tutorial Deep Sky Stack: https://h5.seestar.com/course/79051


The final image usually looks much better.


AI Denoise
(December 2024) ZWO has just added an AI Denoise feature. When viewing the live image on your screen or an image stored in your Seestar’s My Album, click the denoise button and your Seestar will apply an AI algorithm and clean the image up. You will then have the option of saving the resulting image to your tablet or phone. The changes to your images might be subtle, but in most cases they are noticeable (see before and after below).
ZWO tutorial AI Denoise function: https://h5.seestar.com/course/111392


Before AI Denoise


After AI Denoise
Mosaic Mode
In October 2024, ZWO added a “mosaic“ mode. This allows one to take images that are offset from the previous vertical only orientation or to expand the view to capture wider field objects. Note that when using the mosaic mode, you do not have to save individual sub frames – they don’t re-stack well.
ZWO tutorial Mosaic mode: Not yet available.


Plan Function
(January 2025) ZWO has just added a Plan function. This will allow you to set up an observing plan that steps through different objects over a period of time. You simply lay out your plan by choosing your planned targets.
- Layout the plan targets.
- If necessary, adjust the framing to be used. You can also choose to shoot a mosaic.
- Selected a starting and ending time for each target.
- Click on Execute and your Seestar will execute the plan.
- Click Stop at any time to halt the process.
- When finished, click on the plan and Seestar will show a list of your planned targets.
- Click view for each target to see the resulting image.
- Make sure you are saving your sub files so you can re-stack everything at the end of the plan.
- Be careful with any attachments. Seestar will close the arm at the conclusion of the plan.
ZWO tutorial Plan function: Not yet available.


EQ Mode
(March 2025) ZWO has added the option for EQ mode observing. This will allow you to point your Seestar toward the north celestial pole and take longer exposures. It does require a wedge or something to tilt your Seestar to the correct angle (see below). You might perform the alignment three times (leave the Mount Mode each time). I read an article that suggested the second alignment is more accurate than the first, and the third is a check to make sure everything is green. ZWO tutorial EQ mode: https://h5.seestar.com/course/159727.
- Make sure the tripod is level before doing the polar alignment.
- Go to Advance Features.
- Choose Mount Mode.
- Follow the instructions to align your Seestar properly.
- Winston-Salem: 36o 5’ 59.5” (36.10)
- Pilot Mountain: 36o 23’ 11.5″
- Bullington: 36o 20’ tbd” (36.335)


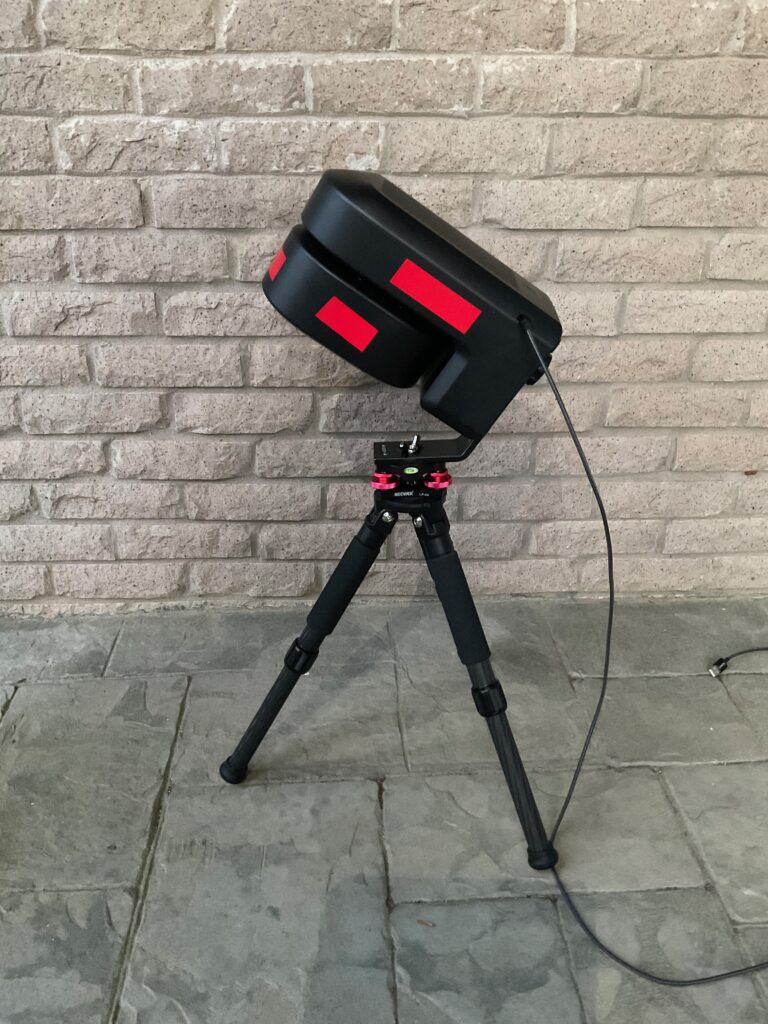
You will need a wedge to properly align your Seestar. A few suggestions are below. See our Purchasing section for additional information on where to buy a wedge.
- You can use a camera head that comes with a standard tripod – provided you find an adaptor from a 1/4” to 3/8” screw.
- ZWO has introduced their TH10 Hydraulic Tripod Head. It might be a rebranding of (or is similar to) the Innorel F20 Fluid Head, which can be found on Amazon.
- The Peterson Engineering Mount looks interesting. It is a custom made mount for your latitude.
- Many people are using the Sky Watcher Mount. One of its knobs (with a M8 bolt screw) is too large and you may have to replace it with a smaller knob or longer bolt screw (maybe 70mm or more). You can also increase the gap with a leveler. The safety stop might be a bit too long, so don’t tighten it all the way. You might need a mounting plate such as a Vixen dovetail plate with a 3/8” screw. Attach the mounting plate to the Seestar with the safety stop toward the power button.


For more information, see the references below.
- “Seestar Step by Step Live EQ Mode Demo.” Astronomy Tips & Reviews with Curtis/YouTube. March 2025.
- “Get Ready for the Seestar EQ Mode.” Astronomy Tips & Reviews with Curtis/YouTube. March 21, 2025.
- Brian Sutphin. “Polar Alignment.” Facebook.
- Dale Hollenbaugh. “EQ Bases for Seestar.“ Facebook.
- “Equatorial EZ Mount for Seestar.” Peterson Engineering.
- “Sky Watcher S20530 (EQ) Base.” Amazon.
Imaging the Moon, Sun, and Planets
For Solar System objects (the Moon, Sun, and Planets), the screen is a little different. You have a 1x, 2x, and 4x zoom option. Your Seestar allows you to simply take a photo. You can also take videos or time-lapse videos. If you save the RAW video frames, the frames can be stacked to produce a final images
I’ve noticed that my Seestar sometimes has trouble locating the targeted object. I found that leveling the Seestar and pointing to deep-sky object first helps get it orientated. Once there, you can then point to a Solar System target.
Make sure to use the solar filter when viewing and imaging the Sun!
Imaging Planets with a Seestar isn’t the easiest process. In most cases, planets are way too bright. You can, however, easily get a nice view of Jupiter (no details) and its moons. However, for more detail, the best approach is to click on the RAW image option and take a time-lapse video.
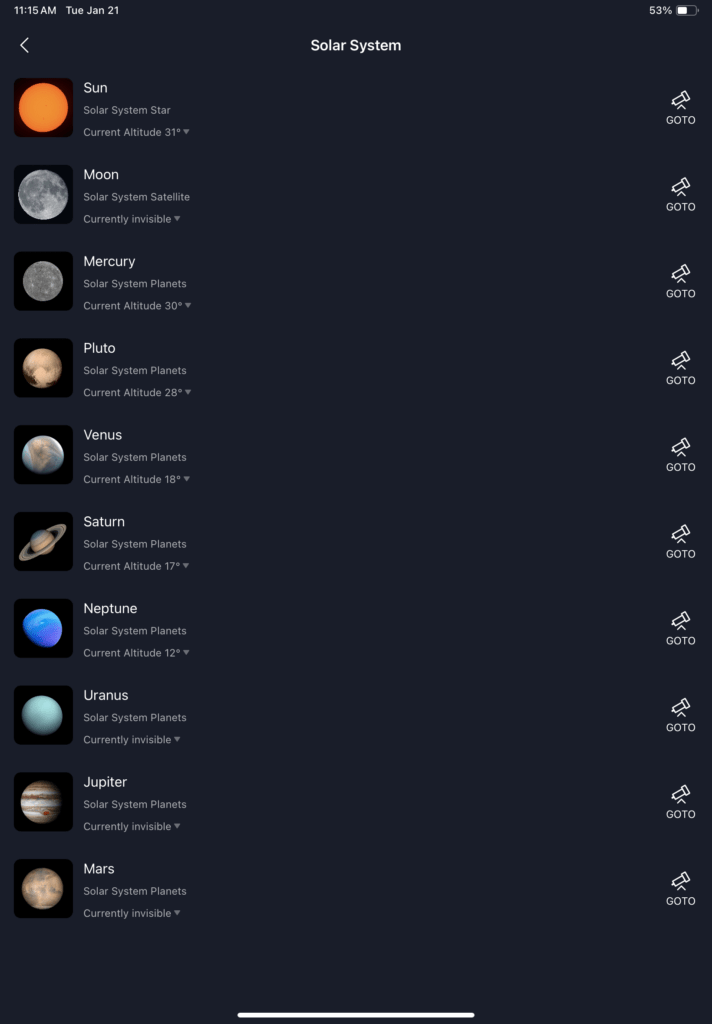
- Choose Solar System from the main screen.
- Select the target (e.g., Moon, Sun, or a planet).
- Your Seestar will move and find the target (Make sure the Solar Filter is in place for the Sun!)
- Choose 2x or 4x for a closer up look.
- Click on Lightness Adjust icon with the +/- in a circle.
- Choose Manual and reduce the brightness as much as possible.
- Click RAW to save sub images.
- Take a few minutes of a video or time-lapse video.


When finished, go to your time-lapse video, re-stack it, and make further adjustments.
- Go to My Albums.
- Choose Seestar and Planetary.
- Locate and open your video or time-lapse video.
- Click on Stack to re-stack your RAW frames.
- When finished, edit the image by adjusting the brightness and sharpness.
- Save the final image.


Process Images in 3rd party software
If you connect your Seestar to your computer with a usb c cable, you can export the individual sub frames (in fit format) for stacking and processing in other software packages such as Siril. Make sure to first remove the “bad” sub frames as noted above. Then copy the sub frames from Seestar’s MyWorks folder to your computer. You can also copy files using your wi-fi connection (see the tutorial below).
- ZWO tutorial Image Storage. https://h5.seestar.com/course/79047
- ZWO tutorial Transfer Files using Wi-Fi https://h5.seestar.com/course/79218
The images below were processed in Siril following a basic workflow. They still have a brownish background and a fair amount of background noise. Using a more advanced (and complex) workflow in Siril will address these issues.


Images processed in Siril (C. Richard et al., Journal of Open Source Software, 2024, 9(102), 7242. DOI: 10.21105/joss.07242)
Summary Set of Images Illustrating the Entire Process
Here is a summary set of images taking you through the entire process: Original Stacked Image, Original Stacked Image with AI Denoise, Re-stacked Image, Re-stacked Image with AI Denoise, Siril Image with auto stretch, and Siril Image with manual stretch.


Images processed in Siril (C. Richard et al., Journal of Open Source Software, 2024, 9(102), 7242. DOI: 10.21105/joss.07242)
You must be logged in to post a comment.